Here is a typical case, imagined for this page: the first bracket a designer named Priya sold cracked on day two. The 1.2 mm wall beside the screw hole gave up, and a photo of two grey halves arrived with a single question mark. She thickened that wall to 2.4 mm, added a 1 mm fillet where the stress gathered, rotated the part so the layers ran along the load instead of across it, and sent a free reprint file. Fixes like that are a large part of online 3d printing designer jobs, where the task is turning a client's idea into a file that prints well and holds up in use.
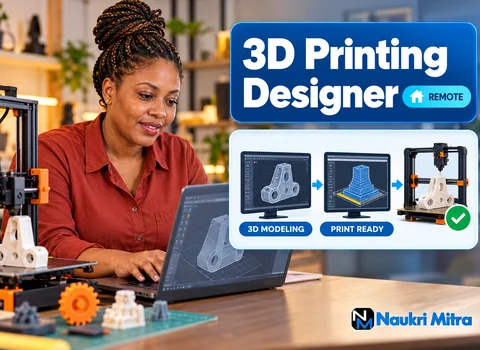
This listing is for a part-time, fully remote 3D Printing Designer paid USD 25 per hour, open worldwide. Briefs arrive as sketches, photos, broken parts, or napkin measurements, and the client needs a clean STL to print at home or send to a print farm. Put simply, a 3D printing designer's job is to take that input and return a file that prints.
Step One: Brief, Photos and Calipers
Most jobs start with a client's practical problem. A hobbyist wants a jar lid. A drone owner needs a replacement arm. Your first job is to get numbers out of them, and if you ask what a 3D printing designer does, a surprising share of the answer is asking for better measurements.
- Ask for photos with a ruler or calipers in frame, not just a description.
- Confirm which faces are critical: the bore that slides over a 22 mm tube matters; the decorative edge does not.
- Find out the printer and material before you model anything. A design meant for PLA on a hobby FDM machine is not the same part as one meant for resin.
- Write the agreed dimensions back in one message so nobody argues later.
Step Two: Modeling in Fusion 360, Blender or Tinkercad
The listing names three tools, and each has its place. Fusion 360 is the workhorse for anything mechanical: parametric sketches, constraints, and a timeline you can scroll back through when the client says the hole should be 6 mm instead of 5. Blender suits organic shapes like figurines and cosplay pieces. Tinkercad is fine for quick, simple parts.
The core 3D printing design skills come down to picking the right tool for the shape, then keeping the model clean enough that the next revision takes ten minutes, not an afternoon. Use parameters for anything the client might change.
Step Three: Walls, Tolerances and the 0.2 mm Lid
Here is the other classic failure. You model a lid at exactly the inner diameter of the box, the client prints it, and it will not go on. FDM printers squish plastic slightly wider than the toolpath, so mating parts need clearance. Many designers start with around 0.2 to 0.3 mm per side for a sliding fit and adjust from a quick test print, though the right number depends on the machine.
- Keep walls at a sensible multiple of the nozzle width so the slicer does not leave gaps or thin, weak perimeters.
- Add small fillets at inside corners where loads concentrate.
- Think about the layer direction. A part loaded across its layers can split like a stack of crackers.
Step Four: Supports, Orientation and Overhangs
A model can be perfect on screen and miserable to print. Overhangs past roughly 45 degrees usually need supports on FDM, and supports leave scars. Often the smarter move is to change the design: add a chamfer instead of a flat ceiling, split the part into two pieces that print flat, or orient it so the cosmetic face is on top.
Step Five: FDM or Resin, and What You Tell the Client
Part of the role is advising on materials and print settings. FDM is cheap, tough, and good for functional brackets, clips, and enclosures in PLA, PETG, or similar. Resin gives crisp detail for miniatures and jewelry masters but can be brittle and needs careful hollowing and drain holes. Having run either kind of printer yourself helps you explain failures plainly.
Step Six: STL Export and the Slicer Check
A big share of the daily work is creating printable STL files for clients, and the export is where sloppy models get caught. Before sending anything, check that the mesh is manifold (watertight, no stray faces), that normals point outward, and that the resolution is fine enough for curves without making a 200 MB file. Then drop it into a slicer such as Cura and look at the layer preview, which often catches problems before a client loses an overnight print.
On computer specs: a recent laptop with a decent graphics card and 16 GB of RAM handles most Fusion 360 and Blender work, and slicers are light. Owning a printer isn't required, but it makes testing much easier.
Step Seven: Revisions Without Tears
Expect feedback. The client prints version one, finds the clip too stiff, and asks for a looser snap. Good designers keep a short revision log, change one thing at a time, and send a new file with the version number in the name. Agree upfront how many revision rounds a job is expected to include.
Portfolio First: No Degree Required
This is one of the 3d printing designer jobs for freshers that asks for no degree. A strong portfolio of printable models matters most, so it can also suit people looking for 3d printing designer jobs with no experience in a formal role, as long as you can show work. For each one, show the original sketch or problem, the model, a photo of the actual print, and a line on what you changed after the first attempt.
With zero clients, start by solving your own problems: a cable organizer, a replacement knob, a tool holder. Publish a few free models on Cults3D to collect feedback, then offer small fixed-price jobs to earn first reviews.
People sometimes ask about the difference between a 3D printing designer and a CAD drafter. A drafter usually produces technical drawings to strict manufacturing or construction standards. A 3D printing designer works closer to the printer and usually deals directly with individual clients.
Part-Time Freelance Hours and Where the Gigs Live
This is a part-time, remote role, so it suits people who want 3d printing designer work from home alongside study or another job. No weekly schedule or set hour count appears in the listing; part-time 3D printing designer jobs often work that way, and briefs vary.
Beyond this listing, freelance 3d printing designer jobs show up on Fiverr and Upwork, where clients post one-off parts, and on model marketplaces like Cults3D, where you can sell or commission designs. Product startups, small makers, cosplay builders, and print farms are the usual buyers. As for whether this is profitable long term, plenty of printer owners cannot model their own parts, which supports demand for people who can, though no one can promise future income.
What Online 3D Printing Designer Jobs Pay on This Listing
The figure on this listing is USD 25 per hour, part-time. When people search for the 3D printing designer salary per hour, open-market rates vary widely by skill, portfolio, and client, so treat the listed rate as what this posting offers. Ask whether slicer checks and revision calls count as paid hours.
Courses, Resume and the First Pitch
For training, a 3d printing designer course can be cheap or free. Autodesk's learning materials for Fusion 360 are a solid start, and plenty of free tutorials cover tolerances and print-ready design. The listing treats an Autodesk Fusion 3d printing designer certification as a bonus, so take it if it suits your budget.
For the 3d printing designer resume, keep it to one page and put the portfolio link at the very top. List your tools, printers, and materials, plus two short project stories with numbers. Prepare for 3d printing designer interview questions such as how you would design a snap-fit, why a printed hole comes out small, or how you check a mesh before export.
Send your portfolio, a short note on which tools you use, and one example where a print failed and you fixed the design. It costs nothing to apply, and a client who asks you to pay first is not a real client.